Compose Widget
The compose widget allows you to add pins to images and videos. You can change the colors, values, and icons for each pin.
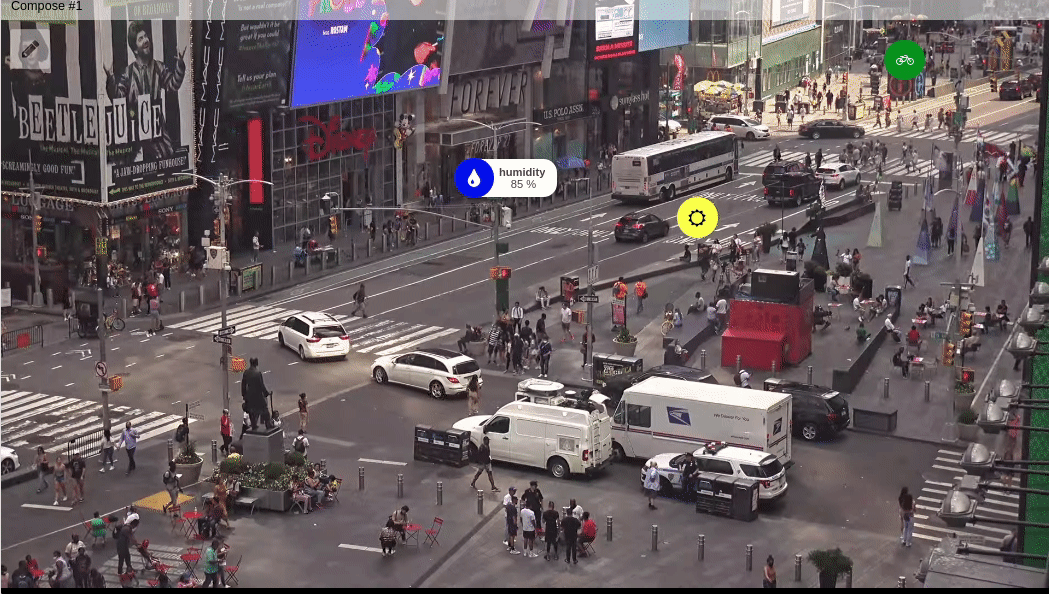
This widget also accepts features like metadata and groups, which can be set in your variable data.
Creating your own
-
1. 'Data From' Field
The Data From field lets you choose the device and variable that will feed the widget. For normal dashboards, select a device from your list and then pick the variable containing the pin data. In Blueprint dashboards, you must first select the Blueprint device; the variable name is then entered manually because the system cannot automatically list variables linked to the Blueprint.
Important: The number of pins you can add is directly tied to the number of devices added in this section—each device can provide one pin. Additionally, at least two variables are required: one for the pin’s data (label, color, icon, etc.) and another to store all pin positions on the media. -
2. Media Backgrounds
The widget supports four background types: an image, a YouTube video, a Vimeo video, or a generic video file. These can be set in the widget edit screen of the TagoIO admin console. You can also adjust the aspect ratio and resize mode (Fill, Contain, Cover) to fit your layout. -
3. Positioning Pins
Pin coordinates are expressed as normalized values between 0 and 1 for both X and Y axes, where (0, 0) is the top‑left corner and (1, 1) is the bottom‑right corner of the media.
Manual method: Includexandyparameters in the variable’s metadata:{
"fixed_position": {
"device_id": {
"device": "Temperature Sensor",
"label": "Pin One",
"color": "#313c46",
"icon": "presentation",
"x": "0.5",
"y": "0.5"
}
},
"file": {
"url": "https://api.tago.io/file/…/video.mp4",
"path": "/buckets/device_id/video.mp4"
}
}Editor method: Enable pin editing in the widget to let users place pins interactively and edit their info boxes.
-
4. Pin Editor
The pin editor, accessed via a pencil icon on the left side of the widget (visible only if editing permissions are granted), allows users to add, modify, or delete pins. The toolbox offers four tools:- Default – zoom and drag the image.
- Add – click on the image to place a new pin (limited by the number of devices).
- Edit – click an existing pin to change its data source, label, embed content, icon, etc.
- Delete – remove a selected pin.
Changes are saved with the widget’s save button; otherwise they are discarded.
-
5. Infobox
Each pin can be linked to an infobox that displays additional information such as images, external links, formulas, or embedded widgets. The infobox content is automatically associated with the corresponding pin and can be customized directly within the editor.