ABS Telemetry
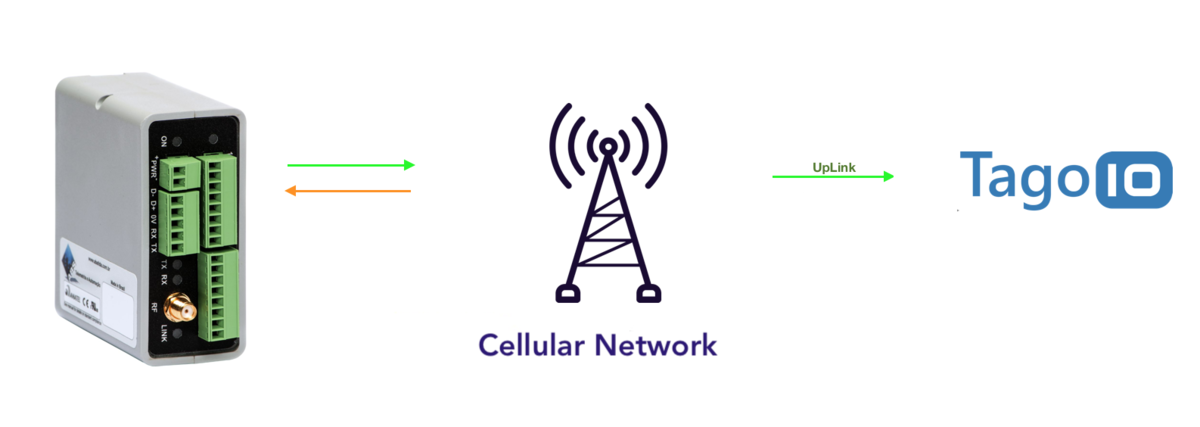
Devices from ABS Telemetry can be easily integrated with TagoIO. The integration allows uplink communication between the device and TagoIO while parsing messages to extract commands and variables in real time.
You will need to set up your device using the ABS portal and your TagoIO account.
ABS Setup
You need to download the ABS software configurator (available here: ABS software configurator download).
Open the file Configurator_cel.exe and follow these steps.
The first step is to configure the basic working parameters. At the main configurator window, be sure to select:
| host type | 99 |
After that, go to the Extended Commands tab and press the HTTP button.
Add TagoIO Host in the HTTP URL field.
Change the method to POST and go to Send Commands – you will have to configure some commands:
| Command | Description |
|---|---|
_extcmd=postcfg info | Return configured values |
_extcmd=postcfg erase | Delete POST settings |
_extcmd=postcfg Content-type,text/plain;Device-Token,_device_token_;;; | Set the two parameters required to configure POST for Tago |
Replace the text
device_tokenwith the value of your device‑token.
Learn more information about the ABS devices configuration.
TagoIO Setup
Add a device in your account at TagoIO. Go to Devices and click on 'Add Devices', filter network by 'Cellular' and pick your device from the list.
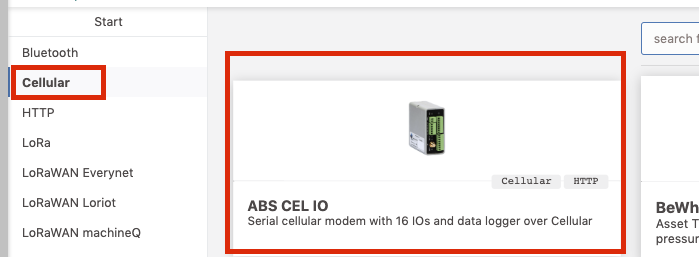
Currently, the following device is integrated with TagoIO: ABS CEL IO
Click on 'Create Device', and you will have confirmation that the device was created.
Turn your device on, and wait for the data to arrive and hit your data bucket, and it will be ready to be shown in the dashboards. You can start to build your Dashboard by adding gauges, tables and more.
Enjoy your ABS devices with TagoIO!