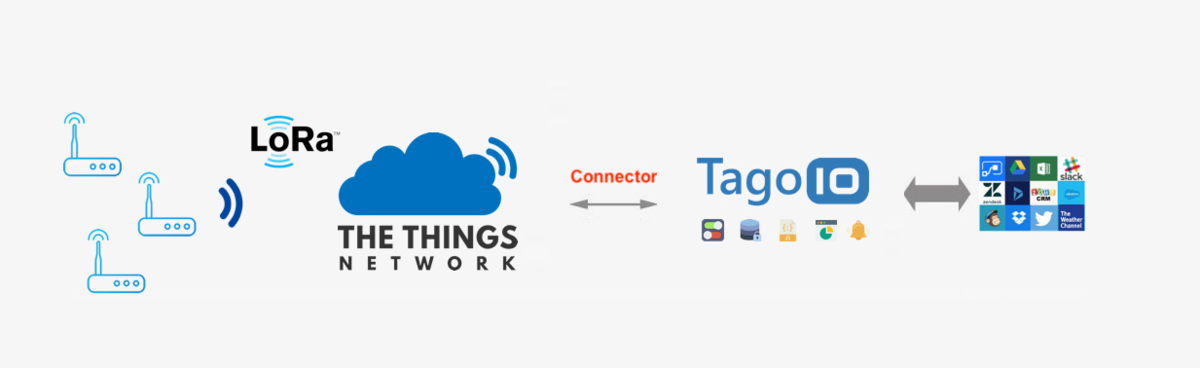
The Things Network LoRaWAN™
This tutorial provides a step-by-step guide to integrate The Things Network (TTN) with the TagoIO platform. By following these instructions, you will enable uplink and downlink operations, allowing data exchange between your LoRaWAN devices and the TagoIO application.
If you're trying to integrate TTI or TTN v3, use our TTI integration instructions.
Prerequisites
Before you begin, ensure you have the following:
- TTN v3 account — If you don't have one, register here.
- LoRaWAN device — Ensure your device is connected to TTN and transmitting data. If you need help doing that, watch this TTN video tutorial.
Step 1: Create Authorization in TagoIO
Create a New Authorization
- Go to Devices in the TagoIO dashboard.
- Click the Create Authorization button.
- Provide a meaningful name for the authorization (e.g.,
TTN-Integration). - Click Save.

Copy the Authorization Token
After creation, copy the authorization token. You will need this in later steps.
Step 2: Configure TTN Integration
- Navigate to your TTN console and open your application.
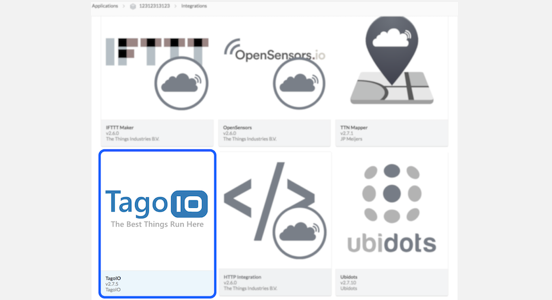
- Go to Integrations > Webhook > + Add Webhook.
- Select Custom Webhook from the list.
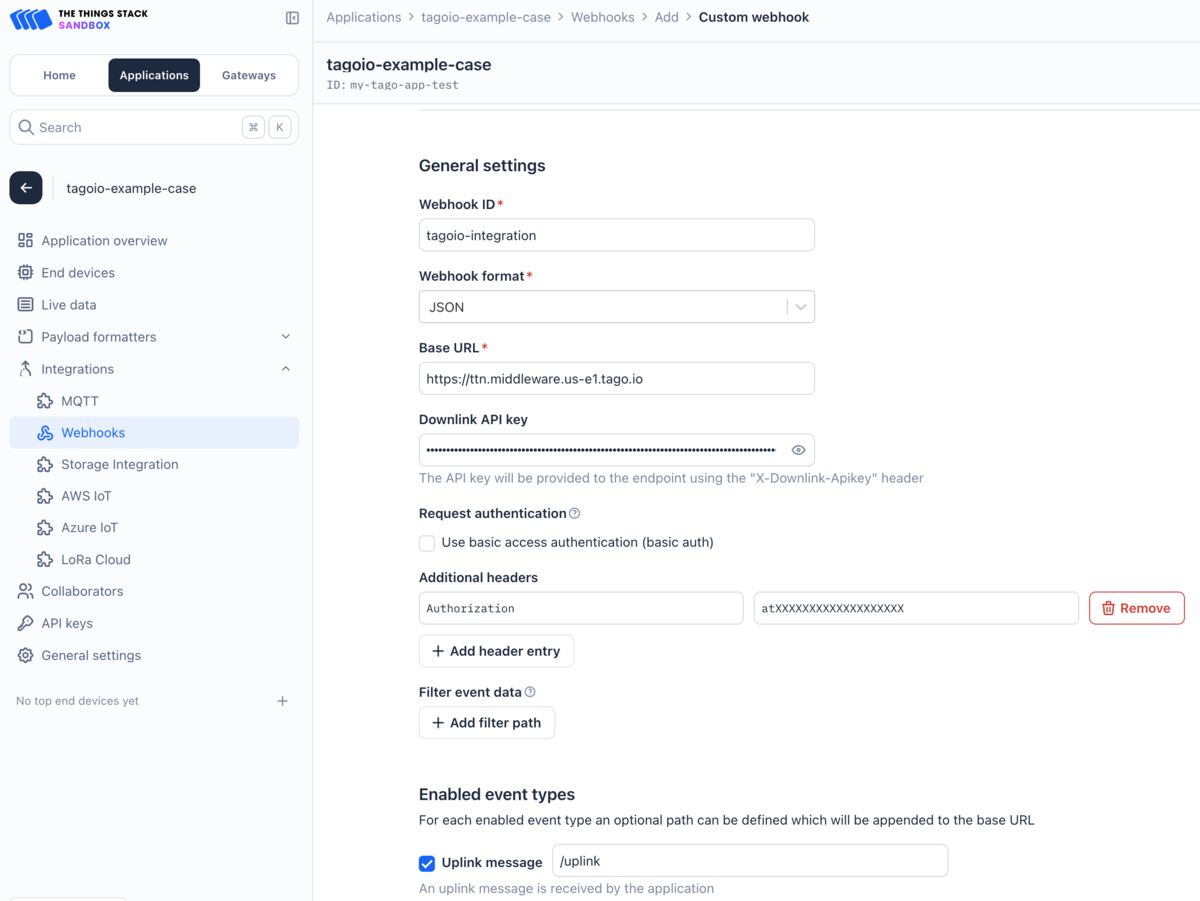
Webhook Configuration
| Field | Description |
|---|---|
| Webhook ID | Enter a unique identifier (e.g., tagoio-integration). |
| Webhook Format | JSON |
| Base URL | Use the endpoint format https://ttn.middleware.REGION.tago.io. Replace REGION with your deployment region (e.g., us-e1, eu-w1). For a list of available regions, visit TagoIO Network Integration. |
| Additional Headers | Add a header key Authorization and set its value to the authorization token you copied in Step 1. |
| Enabled event types | Enable the event types you expect to receive from your device. Set the path of all enabled event types to /uplink. |
Step 3: Add Your Device to TagoIO
Ensure Device EUI Consistency
- When creating the device in TagoIO, use exactly the same Device EUI that is configured in TTN.
- The Device EUI must match exactly to establish a successful connection between TTN and TagoIO.
Select the Appropriate Network and Device Type
- Choose the LoRaWAN TTN network during the device setup process.
- Select the correct device type from the available options. If your device is not listed, you can add support through connectors.
Add Device Support via Connectors (If Necessary)
- If your device type is not available in the default list, enhance its compatibility by utilizing connectors.
- For more information on available connectors and how to use them, refer to the Connector Overview.
For detailed instructions on adding devices, visit the Adding Devices page.
Step 4: Finalize Setup
-
Power On Your Devices
Turn on your LoRaWAN device and gateway to initiate data transmission. -
Verify Data Reception
- In TagoIO, navigate to the Device and open the Data tab to confirm that data is being received.
- Alternatively, use the Live Inspector within your device settings to monitor incoming data in real-time.
With data successfully flowing into TagoIO, you can start creating Dashboards, Analyses, and Actions to visualize and manage your device data effectively.