Geofences in map widgets
Geofences allow developers to color parts of the map and detect or trigger events inside specific areas.
Creating geofences
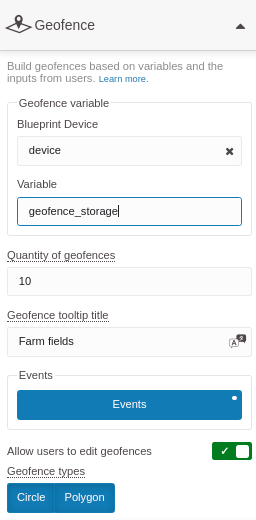
To create a geofence, go to Geofence options in your widget's configuration. Then set the option Allow users to edit geofence to yes. You can choose to allow users to create polygons, circles or both, and even select the number of geofences allowed in the map.
The maximum number of geofences allowed is 99.
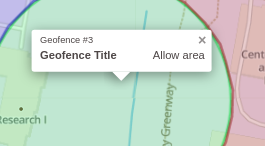
You can also set the title of the geofences in the field Geofence tooltip title. The title will be shown in all of the geofences' pop‑ups, like so:
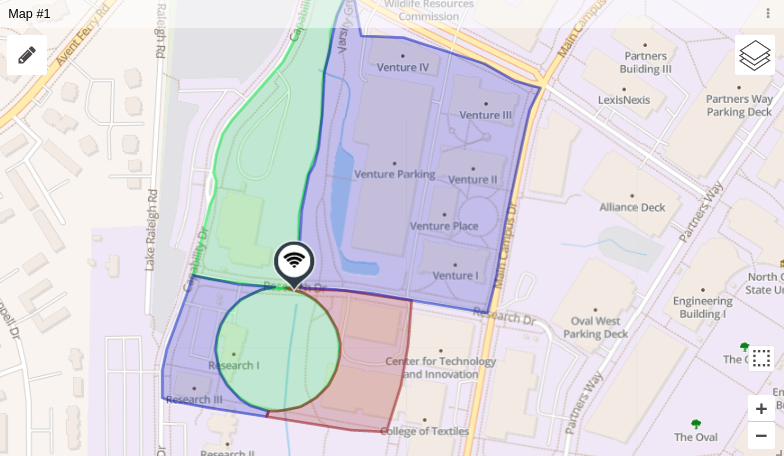
After setting up the options, you are all set to create the geofences. Go to the map widget and click on the pencil icon; use the tools located on the top right of the screen.

The geofence toolbox is composed by:
- Default tool – allows you to zoom and drag the image;
- Draw polygon – click on the image to draw your geofence; when you click on the first drawn point, the geofence ends. You can rename it and add an event on the right of the editor;
- Draw circle – click at the center point of your circle, then click again to select the radius size. When you click the second time, the geofence ends; you can rename it and add an event to the right of the editor;
- Delete tool – delete the geofences by clicking on them.
Below the toolbox, you can find a list of all the geofences that are in the selected layer, and you can edit it by clicking on the geofence name.
Events
You can add events to geofences. To do so, head over to the Geofence Options tab in the map's edit configuration. For each event, set an event code (so it can be identified in analysis) and a description (what users will see). You can also set a layer color; this color will change the color of the geofence itself.

Geofence variable data
The geofences will be saved in a variable, so developers can manage them easily, display the geofences on the map, select the device and variable.
This is similar to the Data From field from the Map Widget.

When users create new geofence areas, they will be saved in the previously selected variable with the following format; notice that you will have the coordinates of the polygons in the variable's metadata.
{
  "id": "5b75c8ccdf9a8e00017f1488",
  "variable": "fence",
  "time": "2018-08-16T18:54:24.000Z",
  "origin": "5b758f096319ee0001f9d570",
  "value": "",
  "metadata": {
    "id": "l1w5r37clqwnk4ntf1rpjx16u1cff1wr5tgt",
    "color": "#00FF22",
    "geolocation": {
      "type": "Polygon",
      "coordinates": [
        [
          [42.300325960559654, -85.63790805637836],
          [42.305971081721594, -85.63798734918238],
          [42.30593698760671, -85.62895853072405],
          [42.29844438901512, -85.62885962426662],
          [42.298453564525126, -85.63375599682331],
          [42.30022652075572, -85.63364267349243]
        ]
      ]
    },
    "event": "area_4"
  }
}