MQTT with Sensor Tag
This example shows how to use the SensorTag Bluetooth module (Texas Instruments CC2650) to send data to TagoIO. No code modification is required on the SensorTag itself; because the SensorTag is used with MQTT, only a configuration setup is necessary.
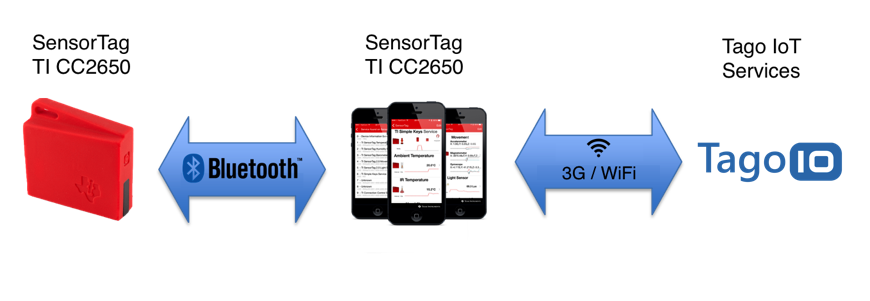
The SensorTag communicates with a mobile device over Bluetooth. Texas Instruments provides a mobile app that converts that Bluetooth communication into MQTT and forwards the data to the cloud over cellular or Wi‑Fi.
Connectivity Diagram
Learn more�
Learn more about the SensorTag CC2650 and how to get started: SensorTag CC2650 and how to get started
What this example does
- All sensor data from the SensorTag will be posted to TagoIO.
- Sensor data can be visualized on a TagoIO dashboard in real time: dashboard.
- This example uses the hardware version tested by the authors.
Sensors included
The tested SensorTag hardware contains the following 10 sensors:
- Light
- Digital microphone
- Magnetic sensor
- Humidity
- Pressure
- Accelerometer
- Gyroscope
- Magnetometer
- Object temperature
- Ambient temperature
Notes and limitations
- There is no native way to control the SensorTag's LED or buzzer using MQTT's subscribe method.
- Only configuration is required on the TagoIO side to receive and process MQTT messages from the SensorTag (via the mobile app).
On this page
- Adding the Device
- Setup the SensorTag to send data to TagoIO
- Creating an MQTT Action to save data
Adding the Device
- Go to Devices in your TagoIO account and click on the Add Device button.
- Select the connector type MQTT and look for the SensorTag device.
- When the device is created, open its details page and copy the generated token.
Setup the SensorTag to send data to TagoIO
- Download the official SensorTag app for Android or iOS (make sure it matches your CC2650 model).
- Open the app, press the power button on the SensorTag so that it starts communicating with your mobile device.
- In the app, tap Cloud configuration and ensure the Bluetooth module is enabled; then select your device from the list.
- Tap All (or the “+” icon at the top right if you have multiple tags) and choose Advanced Configuration.
- In the Advanced cloud config section:
- Broker Address:
mqtt.tago.io(withouthttps://) - Broker Port:
1883 - Username:
tagoio - Password:
<device token>(the token you copied earlier) - Publish Topic:
data - Subscribe Topic: leave as is (not used)
- Publish rate:
5000(you may adjust later)
- Broker Address:
- Turn the switch on to start pushing data to TagoIO.
- If the configuration is correct and you have a network connection, sensor data will begin arriving in your account. You can view it in the Live Inspector tab of the device details. Note that this data is not yet stored in a bucket; you need to create an MQTT Action to save it.
Creating an MQTT Action to save data
- Go to Actions and click Create new.
- Set the trigger type to MQTT Topic.
- Choose the action type Insert data to device bucket.
- Select your SensorTag device, set the topic to
data, and save the action.
Once the action is in place, all incoming MQTT messages on the data topic will be stored in the device’s bucket for further analysis or visualization.