Distributing Dashboards
You can create and share a dashboard template — either without your personal data or using mockup data — and send a link so anyone can install it into their account through a customized installation page. Once the template is installed, users are free to modify the dashboards to suit their needs. The template can be added to your own profile or to other TagoIO accounts.
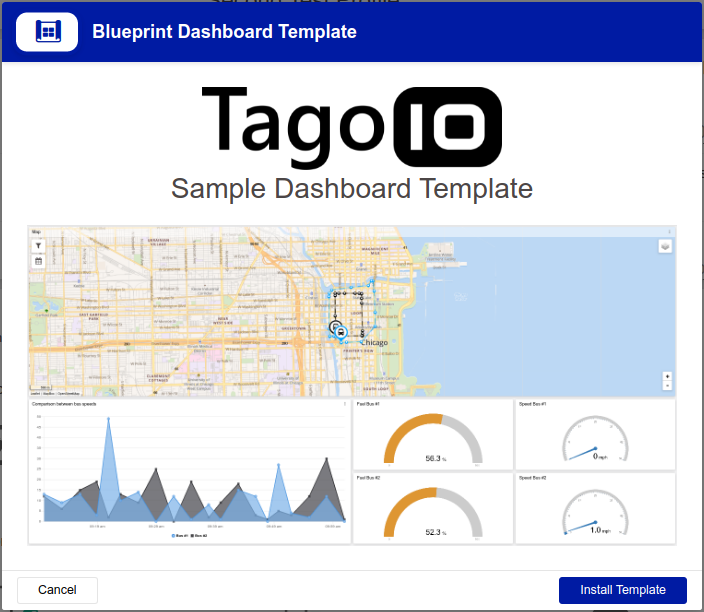
When people click the link you provide, they will be taken to a screen similar to the one shown below. Both the images and the text on the installation page are fully customizable.
Creating & Editing a Template
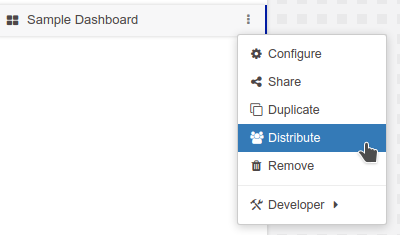
To distribute a dashboard, first click on the options menu of your dashboard, and then on the Distribute option.
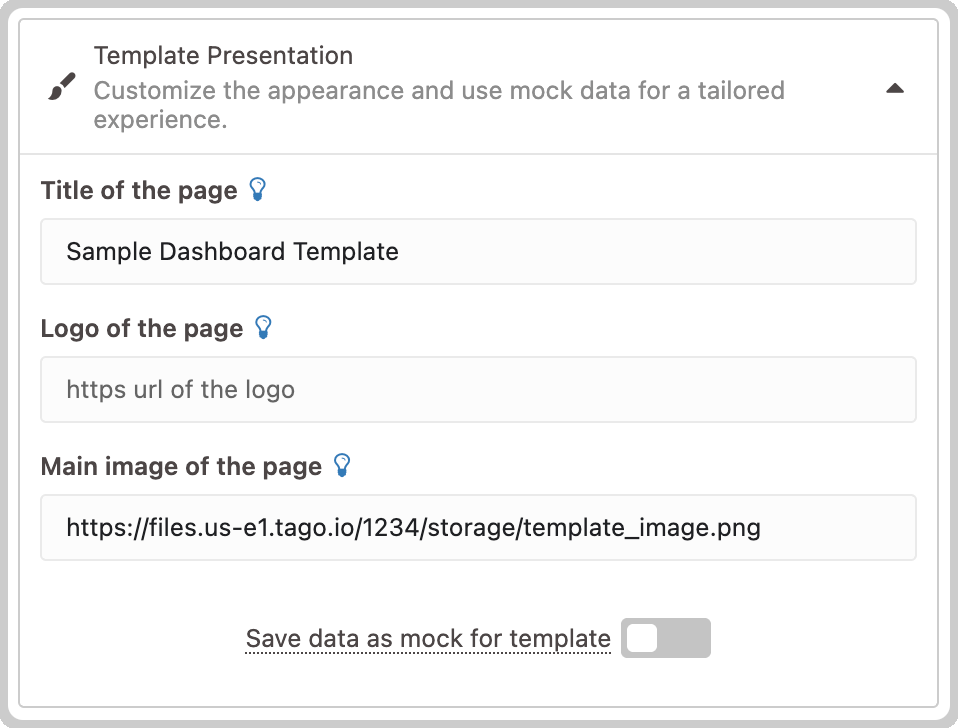
You’ll be redirected to the following page:

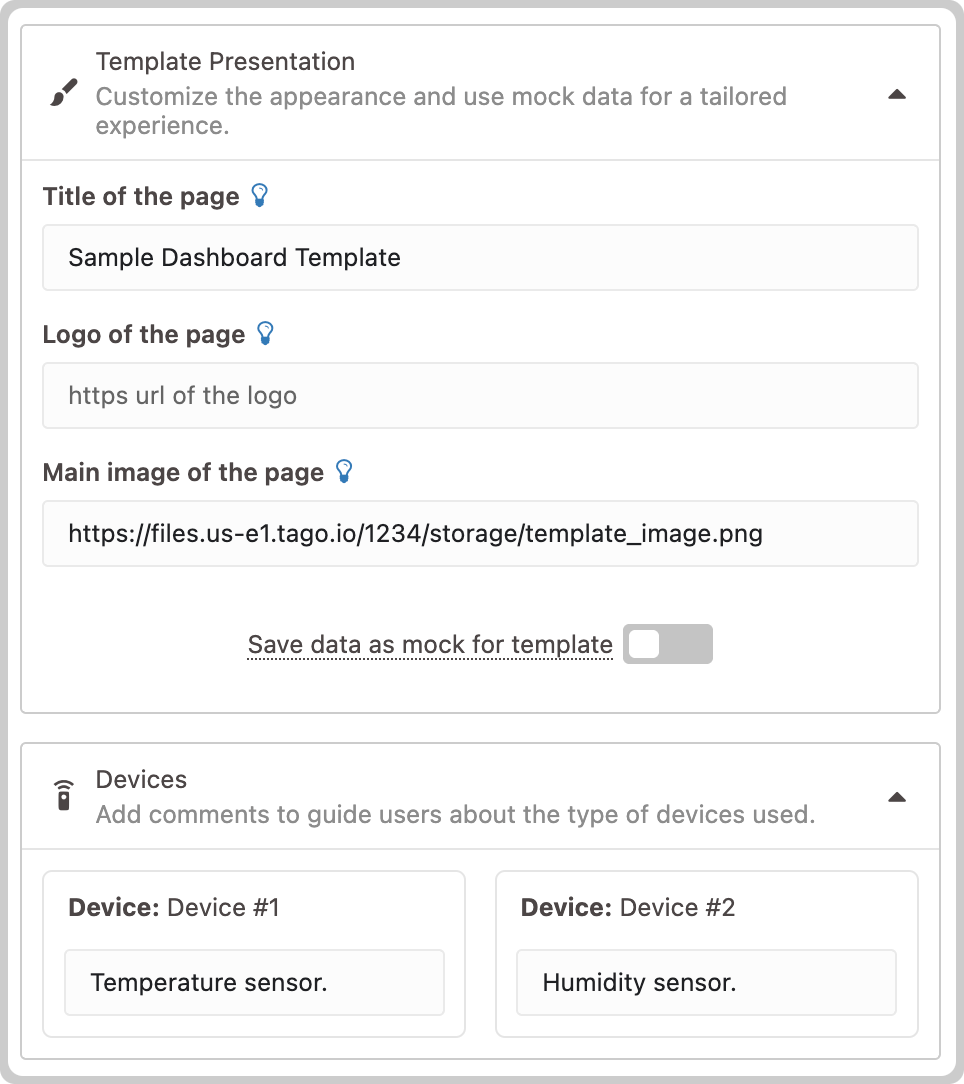
The Distribute function relies on creating a customized install page for anyone to install a copy of your dashboard. In the image above, you can set a custom title for the install page in the field Title of the page. You can also replace the default images with custom ones using the fields Logo of the page and Main image of the page.
You can add descriptions to your Devices, or Blueprint Devices, and Analyses used on the dashboard as well. Descriptions are optional, but they help whoever is installing the template to find their own devices to associate with the ones used on the dashboard.
For example, specifying that one of the devices is a temperature sensor in the description allows the user installing the template to select a matching device on their own profile.
Once you have made the necessary adjustments, click the Create Template button (or Update Template if the template has already been created) to save your information and build the page. When you build your template for the first time, a new section will appear on the page containing the link to be shared with other users.
Alternatively, you can download a file in JSON format—either the Dashboard Structure or Manifest. These files allow you to make your dashboard template publicly available to all TagoIO users so that they can install your template when creating new dashboards within their Admin. Read more at Public Dashboards - TagoIO GitHub.
To share your template using a link, simply click the Copy button or manually copy the link, then distribute it to anyone you would like.
Installing a Template
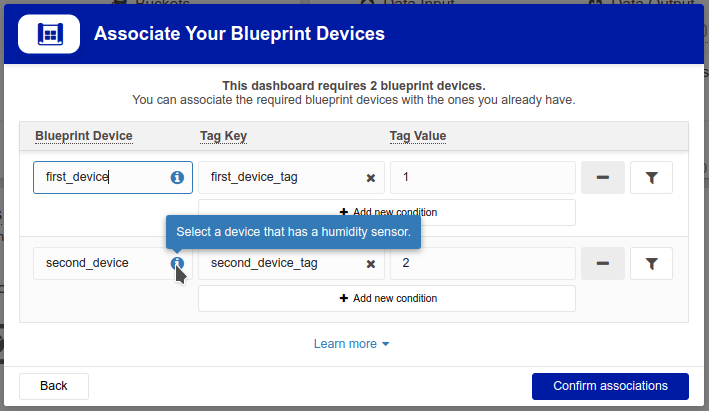
When using a template for a Blueprint dashboard, the Blueprint Devices will be configured exactly like in the dashboard, but with helpful descriptions in case the user needs to make any changes. This also lets the user know which tag keys and values the devices must have configured.
If the dashboard has no Analysis in its widgets, this is the only step and clicking Confirm associations will install the dashboard.
If the dashboard has Analyses, instead of Confirm associations the button will be Next step and it will guide the user to another page to select their own Analyses to be used in place of the Analyses in the original dashboard.
Note that Analyses also have the Distribute feature, and they can be installed previously to installing a dashboard requiring Analyses. Read more about Distributing analysis.
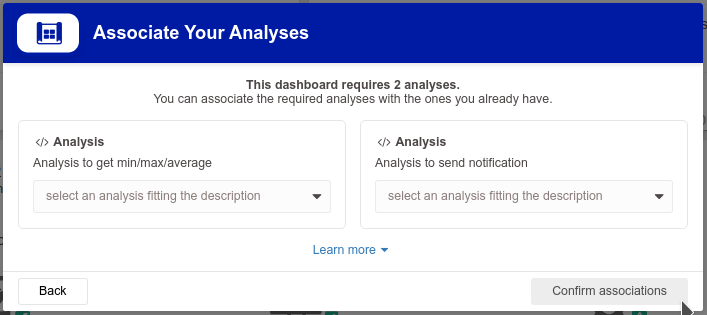
Selecting the required Analyses will enable the Confirm associations button, and the template will be installed using the configurations made on this setup wizard.
For Normal dashboards, the device association page looks like the one above and also functions similarly: all the required devices must be associated before the Confirm associations button is enabled and allows the user to finish installing the template.
Sharing a Template with Mockup Data
You can also share your template along with mockup data from your device so that the widget displays data even before the template is fully configured during installation. This method allows the installer to proceed without immediately associating any device, although the analysis will still require an association.
The mock data is limited to 200 KB. You can restrict the amount of data displayed per widget either by adjusting the settings in the Edit > Options menu or by using a global time filter on the dashboard.