Running Analysis as External using Node.JS
Analysis is what allows you to create powerful applications on TagoIO. When creating an analysis, you must choose whether it will run on TagoIO or externally on your own machine.
You may choose to run an analysis on an external machine for several reasons:
- Development: While developing an analysis, it's best to use a full IDE and debugging mode, which are only available when running Node.js locally on your machine.
- Security: Your company may have legal or compliance requirements that prevent uploading source code to TagoIO services.
- Using third‑party packages: The built‑in analysis environment includes some packages (for example, axios and moment.js), but you may want to use additional npm packages. In combination with the Analysis-Builder, you can use any third‑party package you like and build a more powerful script for TagoIO.
So, let's start with the instructions you need to get your analysis working in an external environment.
1. Install Node.js and NPM
Node.js is a powerful, widely used runtime for running JavaScript outside the browser. It is non‑blocking and event‑driven, making it suitable for data‑intensive real‑time applications. Learn more about node.js.
Open the Node.js Installation Guide for instructions on how to install NPM and Node.js.
2. Create your Environment
In order to start writing your code, you first must set up the environment with Node.JS and NPM.
2.1 Open your favorite command‑line tool like the Windows Command Prompt, PowerShell, Cygwin, Bash or the Git shell (which is installed along with Github for Windows). Then create or navigate to your new project folder.
2.2 If the folder is empty, run npm init and fill in all prompted requests. If this is your first time, you can leave all defaults by just pressing enter.
2.3 Now install the Tago SDK and the TagoIO‑Builder SDK:
npm install --save @tago-io/sdk
npm install -g @tago-io/builder
To know how to use the SDK for coding an Analysis, use our SDK documentation.
This will start the installation of the TagoIO SDK and the TagoIO‑Builder if you wish to upload your script later at TagoIO.
2.4 Create a file called analysis.js. Open it with your favorite editor, like Visual Studio Code or even Notepad. You can write the code exactly as you would do on the TagoIO editor.
You can get the Hello World analysis example by clicking here.
3. Running your Analysis
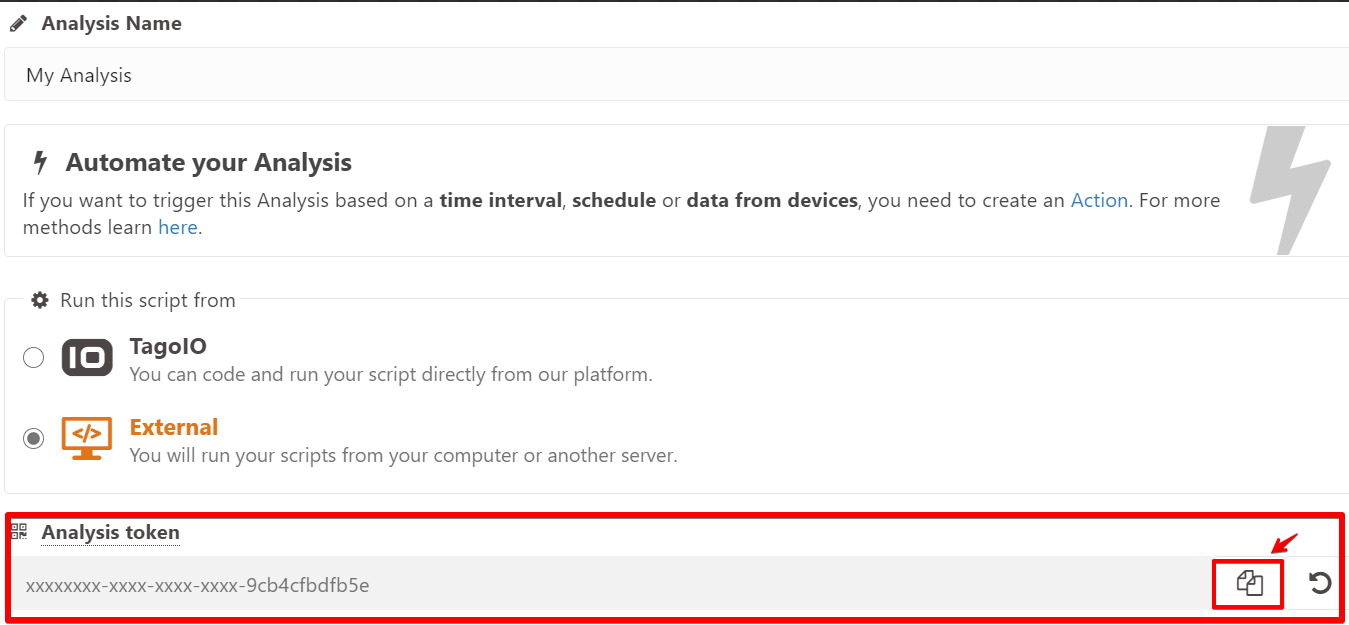
After the code and the environment are set, you only need to make sure you put the right Analysis token into your analysis file.
In order to do that, every analysis has the following line below. Replace MY-ANALYSIS-TOKEN-HERE with your analysis token:
module.exports = new Analysis(myAnalysis, { token: '**MY-ANALYSIS-TOKEN-HERE**' } );
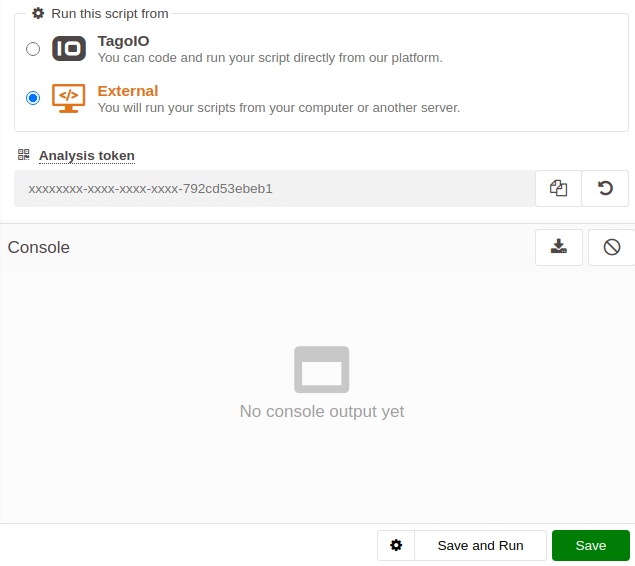
You can get the analysis token by accessing your analysis page at TagoIO and selecting External for “Run the scripts from”. Create a new analysis if you don’t have any.
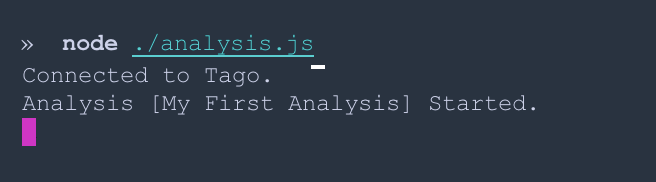
Now run the script from your command line:
node ./analysis.js
You should see a prompt similar to this:
Go back to Tago and click Save and Run or just Run to run your script. You can also configure an action to run your script automatically.
4. Use Analysis‑Builder to Upload the Script
If you only want to run the scripts on your machine, this step is not required. But if you want to build powerful scripts to upload at TagoIO, with several folders, imports, and third‑party packages, you must use the analysis‑builder to compile the scripts.
To do that:
- Ensure
@tago-io/builderis installed globally:npm install -g @tago-io/builder - In your terminal run:
analysis-builder my_script.js - Upload the generated
new_name.tago-io.jsfile to your analysis at TagoIO.
More Examples
You can check our analysis examples with the full environment already set up for you below:
Now you have everything you need to know about running analysis in your machine and can start to creating full applications and powerful analysis using TagoIO